How to Clean Your AC Filter (Step-by-Step Guide with Photos)
Cleaning your AC filter is the single most important maintenance task you can do yourself. We have seen firsthand how a simple ten-minute routine can save homeowners hundreds of Ringgit on TNB bills. It costs nothing, yet it significantly improves your unit’s cooling performance and energy efficiency.
Here’s exactly how to do it right.
Why Filter Cleaning Matters
A dirty filter is essentially a hidden tax on your monthly expenses. We find that a clogged screen restricts airflow by 5-15%, forcing the compressor to run longer to reach the same temperature. This extra workload pushes your electricity usage into higher tariff blocks, which can get expensive quickly in Malaysia’s tiered pricing system.
Beyond the cost, there is the issue of our local climate. Kuala Lumpur’s average humidity hovers between 70% and 90%, creating the perfect breeding ground for mold and “biofilm”—that jelly-like substance that clogs drain pipes. Regular cleaning is your first line of defense against:
- Frozen evaporator coils that stop cooling entirely
- Sudden water leaks damaging your walls or parquet flooring
- Premature compressor failure due to overheating
- Poor indoor air quality circulating allergens and dust mites
How Often to Clean
The standard “every 3 months” advice doesn’t apply to the Klang Valley. We recommend a more aggressive schedule based on how you actually use your air conditioner.
| Usage Scenario | Cleaning Frequency |
|---|---|
| Heavy Usage (Master bedroom/living room, 8+ hours/day) | Every 2 Weeks |
| Haze Season (When API levels are high) | Weekly |
| Roadside Property (High dust exposure in Kepong/KL) | Every 2 Weeks |
| Pets in Home (Cats/Dogs shedding fur) | Every 2 Weeks |
| Light Usage (Guest room, occasional use) | Every 4-6 Weeks |
Before You Start
What You’ll Need
- Sturdy Step Stool: Essential for high wall-mounted units in condos.
- Mild Dish Soap: Any common brand like Sunlight or Glo works perfectly.
- Soft Brush: An old toothbrush or a paintbrush is ideal for delicate mesh.
- Clean Towels: Microfiber is best to avoid leaving lint behind.
- Vacuum Cleaner (Optional): Helpful if the dust layer is thick.
Safety First
- Turn off the remote: Stop the unit completely.
- Isolate the power: Flip the red neon switch on your wall or the breaker in your DB box. We always advise killing the power at the source to prevent accidental shocks.
- Wait 5 minutes: Allow the internal capacitors to discharge and the unit to cool down.
Step 1: Turn Off the AC
Start by ensuring the unit is completely powered down.
- Press the OFF button on your remote control.
- Wait for the louvers (flaps) to close fully.
- Switch off the dedicated wall switch (isolator) usually located next to the unit.
Never attempt to open the panel while the blower is still spinning.
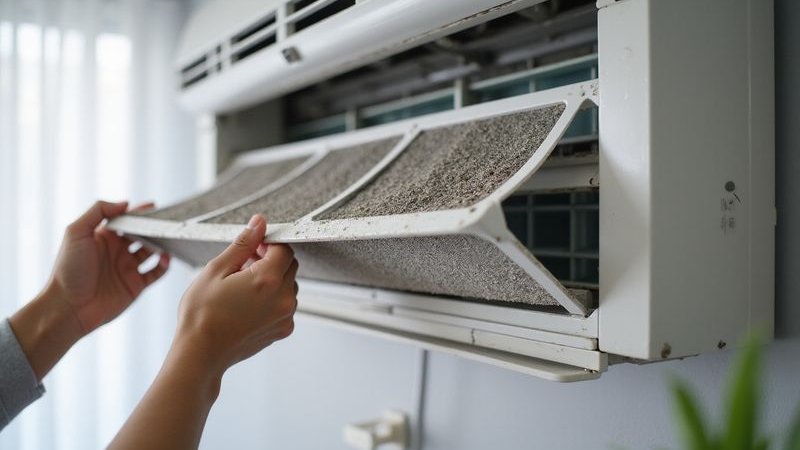
Step 2: Open the Front Panel
Most wall-mounted units from brands like Daikin, Panasonic, and Acson use a similar lift-up mechanism.
- Locate the small indentations or tabs on the left and right sides of the unit’s casing.
- Gently pull both sides toward you and lift upward simultaneously.
- Continue lifting until you feel the panel click into its “service position” (it should stay up on its own).
Pro Tip: Old plastic becomes brittle after years of exposure to heat. We suggest lifting slowly and evenly to avoid snapping the hinge clips, which is a common issue with aging units in older Kepong neighborhoods.
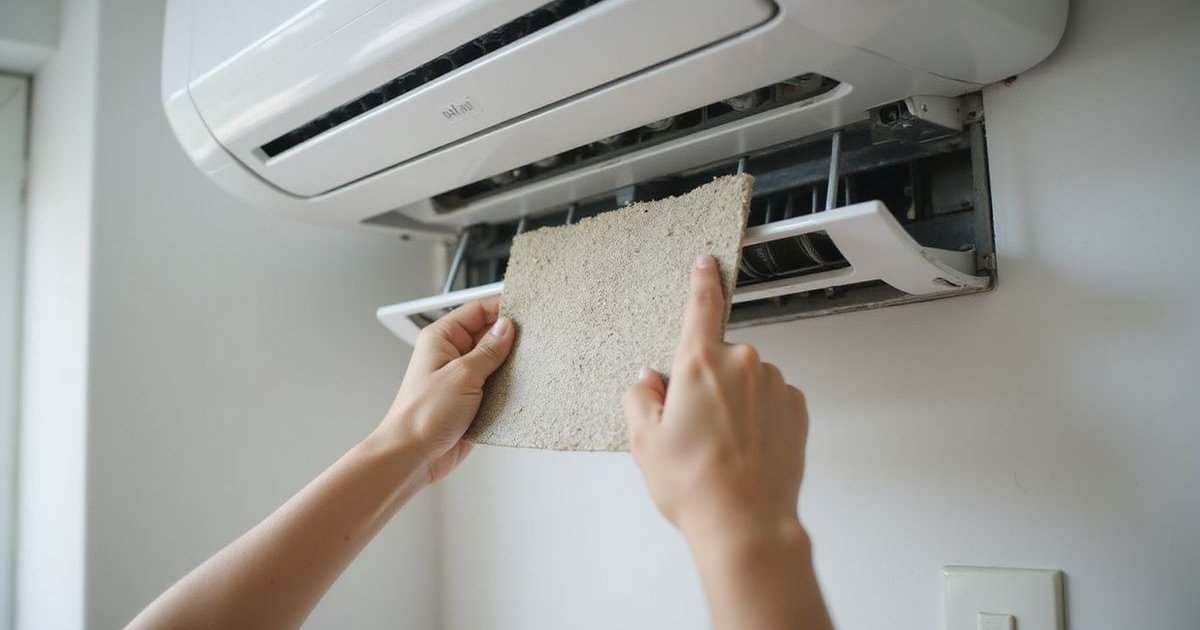
Step 3: Remove the Filters
With the panel raised, you will see the two main mesh filters covering the cooling coils.
- Push the filter tab slightly up to release it from the holding clip.
- Slide the filter down gently to remove it.
- Grip the frame firmly but carefully—do not squeeze the mesh itself.
Note: If you have a Panasonic or Daikin unit, you might see smaller rectangular filters attached to the main mesh (often blue or green). These are specialized bio-filters (like titanium apatite or catechin). Our team advises checking if these are washable or need replacement, as some lose effectiveness if soaked.
Step 4: Inspect the Filter
Take a moment to check the condition of the mesh.
Light Dust Coating:
- You can still see light through the mesh.
- A quick water rinse is sufficient.
Thick Gray “Blanket”:
- The mesh is completely blocked.
- Soap and light brushing are required to cut through the grease and dust.
Sticky or Jelly-like Residue:
- This indicates cooking grease or biofilm buildup.
- You will need a thorough soak with dish soap.
Visible Tears or Holes:
- The filter is compromised and won’t protect your coil.
- Replacement is necessary (search for your model number on Shopee or Lazada).
Step 5: Remove Loose Dust
Before wetting the filter, get rid of the heavy debris.
- Take the filters to a balcony or open area.
- Gently tap the frame against a hard surface to shake off loose clumps.
- Alternatively, use a vacuum with a brush attachment on the front side of the filter.
Avoiding this step often leads to a clogged sink drain, as wet dust turns into a muddy sludge.
Step 6: Wash the Filter
For Standard Maintenance:
- Run cool water over the filter.
- Crucial: Direct the water stream from the back (the side that faced the coils) through to the front. This pushes the dust out of the mesh rather than driving it deeper in.
For Deep Cleaning:
- Fill a basin with room-temperature water.
- Mix in a teaspoon of mild dish soap.
- Submerge the filters and let them soak for 10 minutes to break down sticky pollutants.
- Use a soft brush to gently scrub the mesh in a vertical motion.
What to Avoid:
- Hot Water: It can warp the plastic frame, making it impossible to reinstall.
- Harsh Chemicals: Bleach or strong detergents can damage the antimicrobial coating.
- Stiff Brushes: Scrubbing too hard will tear the delicate nylon mesh.
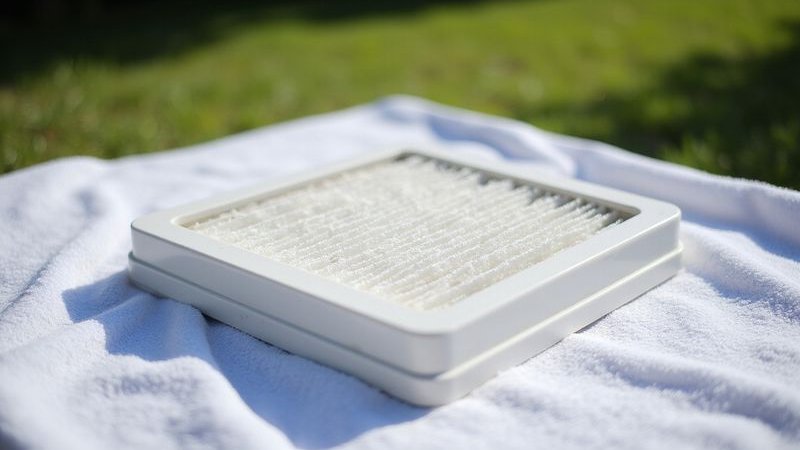
Step 7: Dry the Filter
Proper drying is critical in our humid climate.
- Shake off excess water gently.
- Pat the frame dry with a clean towel.
- Lean the filters against a wall in a shaded, well-ventilated area.
Warning: We strongly advise against drying your filters in direct sunlight. While the Malaysian sun is strong, the UV rays will degrade the plastic mesh rapidly, making it brittle and prone to cracking. Always dry in the shade or under a fan.
Step 8: Clean the Filter Area (Optional but Recommended)
While the filters are drying, take a minute to address the unit itself.
- Use a damp cloth to wipe down the plastic louvers and the front panel.
- Look at the metal fins (evaporator coil) behind where the filters sit.
- Check for black spots or fuzzy growth on the blower wheel (the spinning cylinder inside).
If you see a thick layer of gray dust or mold on the fins, a simple filter clean won’t be enough. This is a sign that your unit needs a professional chemical cleaning.
Step 9: Reinstall the Filter
Once the filters are 100% bone dry:
- Identify the “Front” marking on the filter frame.
- Slide the filter back into the guide tracks on the AC unit.
- Push gently until the bottom tabs click securely into the locking mechanism.
Check: The filter should sit flush against the unit. Gaps allow unfiltered air to bypass the screen, depositing dust directly onto the cooling coils.
Step 10: Close the Panel and Test
- Lower the front panel slowly.
- Press firmly on the left and right corners until you hear a “snap” sound.
- Turn the power back on at the wall switch.
- Use the remote to run the AC on “Cool” mode for 15 minutes.
You should feel a stronger, fresher breeze almost immediately.
Common Mistakes to Avoid
Drying with a Hairdryer
“I’m in a rush, I’ll just blast it with hot air.” The Reality: The concentrated heat will warp the mesh instantly, rendering the filter useless.
Reinstalling Wet Filters
“It’s just a little damp, the AC wind will dry it.” The Reality: Moisture inside a dark AC unit is a guaranteed recipe for mold growth. Always wait until it’s completely dry.
Ignoring the “Click”
“It looks like it’s in place.” The Reality: If the panel isn’t clicked shut, the unit may vibrate noisily or the sensor may not read the room temperature accurately.
Washing the Remote
“The remote looks dirty too.” The Reality: Never use water on the remote. Use a slightly damp cloth or an alcohol wipe to clean the surface buttons only.
Filter Cleaning Schedule Template
We created this simple tracker to help you stay consistent.
| Date | Usage Level | Action Taken | Notes |
|---|---|---|---|
| Week 1 | Heavy (Nightly) | Rinse | Quick dust removal |
| Week 3 | Heavy (Nightly) | Soap Wash | Removed sticky residue |
| Week 5 | |||
| Week 7 |
Need Professional Cleaning?
Filter cleaning is essential DIY maintenance, but it cannot reach the deep internal components where mold loves to hide. We recommend a professional chemical wash once a year (or every 6 months for heavy usage) to flush out the evaporator coil and drainage system.
If you notice these signs, filters alone won’t fix the problem:
- Water dripping from the unit
- Airflow is weak even after cleaning filters
- A musty, sour smell when the AC starts up
- Visible black specks on the blower fan
It’s likely time for a professional chemical wash.
WhatsApp us at 012-2252 623 to book a service. Our chemical wash (RM180/unit) includes a comprehensive teardown and cleaning of the blower, tray, and coils that you can’t reach yourself.
Serving Kepong, Mont Kiara, Desa ParkCity, and surrounding areas with same-day availability.